
인스타그램 크롤링
- 부캠 팀원들과 피어세션의 연장선으로 소규모 프로젝트 “나만의 데이터셋 만들기” 를 해볼것이다.
- Google images download에서 긁어오는 이미지 이외에 더 다양한 이미지를 얻기 위해서 인스타그램 크롤링을 시도해보기로 하였다.
pycharm 설치
brew install —cask pycharm-ce- 환경변수: conda 기존에 만들어놨던 가상환경으로 지정
conda install needs
- beautifulsoup4
conda install beautifulsoup4- 사용 시,
bs4라는 이름으로 사용가능 from bs4 import BeautifulSoup
- 사용 시,
- requests
conda install -c anaconda requestsimport requests
Chrome Driver 설치
- 크롬 버전에 맞는 크롬 드라이버 설치
- 크롬드라이버를 프로젝트 내부로 위치시키기(py 파일과 동일한 위치로 이동)
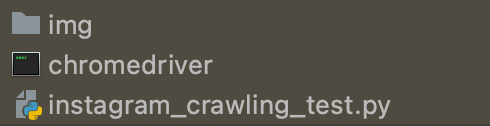
- img 폴더, 크롬드라이버, 코드 이렇게 3개는 동일한 위치에 있어야한다.
코드
1
2
3
4
5
6
7
8
9
10
11
12
13
14
15
16
17
18
19
20
21
22
23
24
25
26
27
28
29
30
31
32
33
34
35
36
37
38
39
40
41
42
43
44
45
46
47
48
49
50
51
52
53
54
55
56
57
58
59
60
61
62
63
64
65
66
67
68
69
70
71
72
73
74
75
76
77
78
79
80
81
82
83
from selenium import webdriver as wd
from bs4 import BeautifulSoup
import time
import requests
import shutil
from selenium.webdriver.common.keys import Keys # 참고!

# 사전 정보 정의
username = '아이디' # 아이디
userpw = '패스워드' # 패스워드
hashTag = '검색어' # 검색 태그
N = 5 # 스크롤 몇번 내릴지 설정
M = 60 # 이미지 몇개 다운로드 받을지 설정

loginUrl = 'https://www.instagram.com/accounts/login/' # 인스타그램 로그인 URL
tagUrl = 'https://www.instagram.com/explore/tags/' + hashTag + '/' # 해시태그 URL

# driver load
driver = wd.Chrome(executable_path='./chromedriver')
driver.implicitly_wait(5)

# 웹 사이트 접속
driver.get(loginUrl)

# 로그인 정보 입력
driver.find_element_by_name('username').send_keys(username)
driver.find_element_by_name('password').send_keys(userpw)

# 로그인 버튼 누르기 - 참고!
driver.find_element_by_name('password').send_keys(Keys.ENTER)
driver.implicitly_wait(5)
# 설정 나중에 하기 버튼 누르기 - 참고!
driver.find_element_by_class_name('aOOlW.HoLwm').click()
driver.implicitly_wait(5)

# 태그 입력
driver.find_element_by_xpath("""//*[@id="react-root"]/section/nav/div[2]/div/div/div[2]/input""").send_keys(hashTag)
driver.implicitly_wait(8)

# 태그 리스트 중에서 선택 - 참고!
time.sleep(5)
driver.find_element_by_xpath("""//*[@id="react-root"]/section/nav/div[2]/div/div/div[2]/input""").send_keys(Keys.ENTER)
driver.find_element_by_xpath("""//*[@id="react-root"]/section/nav/div[2]/div/div/div[2]/input""").send_keys(Keys.ENTER)
driver.find_element_by_xpath("""//*[@id="react-root"]/section/nav/div[2]/div/div/div[2]/input""").send_keys(Keys.ENTER)
time.sleep(7)

html = driver.page_source
soup = BeautifulSoup(html, "lxml")

imglist = []
for i in range(0, N): # 스크롤 내리기 5회
    # select: 페이지에 있는 정보를 다 가져오는 역할
    # 클래스가 여러 개면 기존 클래스의 공백을 없애고 .으로 연결시켜줌
    # 이미지 파일이 들어있는 클래스(.으로 구분해준다)
    insta = soup.select('.v1Nh3.kIKUG._bz0w')

    # 이미지 하나만 가져올 게 아니라 여러 개를 가져올 것이므로 반복문
    for i in insta:
        print('https://www.instagram.com' + i.a['href'])
        imgUrl = i.select_one('.KL4Bh').img['src']
        imglist.append(imgUrl)
        imglist = list(set(imglist))
        html = driver.page_source
        soup = BeautifulSoup(html, "lxml")
        insta = soup.select('.v1Nh3.kIKUG._bz0w')

    driver.execute_script('window.scrollTo(0, document.body.scrollHeight);')
    time.sleep(3)

n = 0

for i in range(0, M):
    print(n)
    image_url = imglist[n]
    resp = requests.get(image_url, stream=True)
    local_file = open('./img/' + hashTag + str(n) + '.jpg', 'wb')
    resp.raw.decode_content = True
    shutil.copyfileobj(resp.raw, local_file)

    n += 1
    del resp

driver.close()
이 코드의 단점은 로그인버튼과 설정 나중에하기 버튼과 태그리스트에서 하나를 골라서 클릭해주는 기능이 없다는 것이다. 따라서 시간초과가 나기 전에 버튼을 눌러야한다. ㅋㅋ → 히스님 도움으로 자동로그인과 설정 나중에하기 버튼, 태그리스트 자동 선택 문제를 해결했다! 바보같이 Keys.RETURN 쓰면서 라이브러리 import를 안해줬었다!
특히 중요한 건! 시간을 많이 줘야한다는 것이다! 우리가 인스타그램에 무언가 입력을 하거나, 무언가 눌러서 행동을 취하면, 해당 액션에 따른 반응이 돌아오는 데에 시간이 소요된다. 따라서 코드에서도 driver.implicitly_wait() 혹은 time.sleep() 함수를 사용해서 다음 코드를 실행하기 전에 응답/반응을 기다려야 한다는 것이다. 많이 기다리지 않으면, 오류 빈도가 높아진다. 따라서 코드에 기다리는 함수를 자주 넣어주자!
Error Handling - system error: 알수없는 개발자?
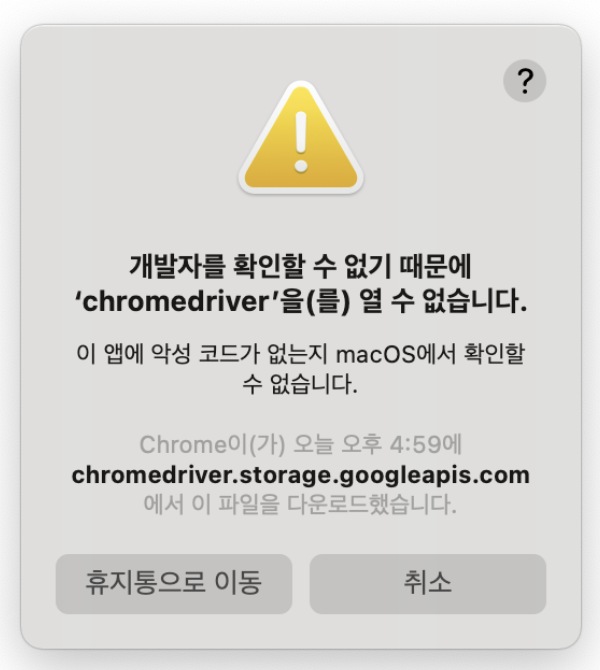
- 만약 개발자를 확인할 수 없기 때문에 열 수 없다는 메시지가 나오면, 터미널을 크롬 드라이버 위치에서 띄운 후, 아래의 명령어로 access 가능하게 설정
$ xattr -d com.apple.quarantine chromedriver
Error Handling - warning: No parser was explicitly specified?
Warning 내역
1
2
3
4
/Users/path/instagram_crawling.py:25: GuessedAtParserWarning: **No parser was explicitly specified**, so I'm using the best available HTML parser for this system ("lxml"). This usually isn't a problem, but if you run this code on another system, or in a different virtual environment, it may use a different parser and behave differently.
The code that caused this warning is on line 25 of the file /Users/path/instagram_crawling.py. To get rid of this warning, pass the additional argument 'features="lxml"' to the BeautifulSoup constructor.

soup = BeautifulSoup(html)
수정
- 설명: BeautifulSoup 생성자에 파라미터
"lxml"을 추가해준다 - lxml 설치:
conda install lxml - 코드 변경:
soup = BeautifulSoup(html, "lxml") - ✅ warning 해결
더 많은 오류가 있었으나, 대부분 웹페이지 접근하는 경로상의 문제였기 때문에 생략하고, 코드로 설명한다!
참고블로그
- https://dahaha.tistory.com/76
- https://beomi.github.io/2017/02/27/HowToMakeWebCrawler-With-Selenium/
- https://jessymin.github.io/web-scraping/2019/10/01/selenium-chrome-binary-error-solution.html
- https://it-neicebee.tistory.com/75?category=890500
- https://wikidocs.net/67691
- https://edu.goorm.io/qna/3367
- https://yxxnah.github.io/2019/10/02/Web-Crawling-4-Selenium/
✔️ Google Colab에서 돌릴때는 방법이 다르다!
- https://ai-run.tistory.com/47
- https://beomi.github.io/2017/09/28/HowToMakeWebCrawler-Headless-Chrome/
✔️ 인스타그램 크롤링에서 Selenium을 사용하는 이유?
- 인스타그램의 코드가 전부 자바스크립트로 만들어져서 일반적인 BeautifulSoup 으로 안되고 webdriver을 사용해줘야한다.
- → sns의 경우는 스크롤 기능이 빈번하기 때문에 JavaScript로 되어있는 경우가 많다. JavaScript 로 되어있는 사이트를 크롤링하려면 selenium 이 유용하다. selenium은 속도가 느리기 때문에 JavaScript로 되어있는 사이트가 아닌 경우라면 beautifulSoup 가 더 선호된다. 대신 터미널에서 어떤 내용이 진행되고 있는지 눈으로 보고 싶다면 selenium 을 쓰면 좋다.